Fingerprint Guide Jewelry – Step-by-Step Instructions for Engraving

This fingerprint guide for jewelry will help you capture clean and detailed prints at home. Whether you’re ordering a custom pendant, ring, or bracelet, a clear fingerprint is essential for beautiful engraving results. Follow this guide to get it right the first time.
What Is a Fingerprint Jewelry Guide?
A fingerprint guide jewelry resource provides instructions for creating high-quality fingerprint images. These prints are used to personalize keepsakes like fingerprint necklaces, memorial keychains, and engraved rings. Our process ensures every ridge and pattern is preserved in metal.
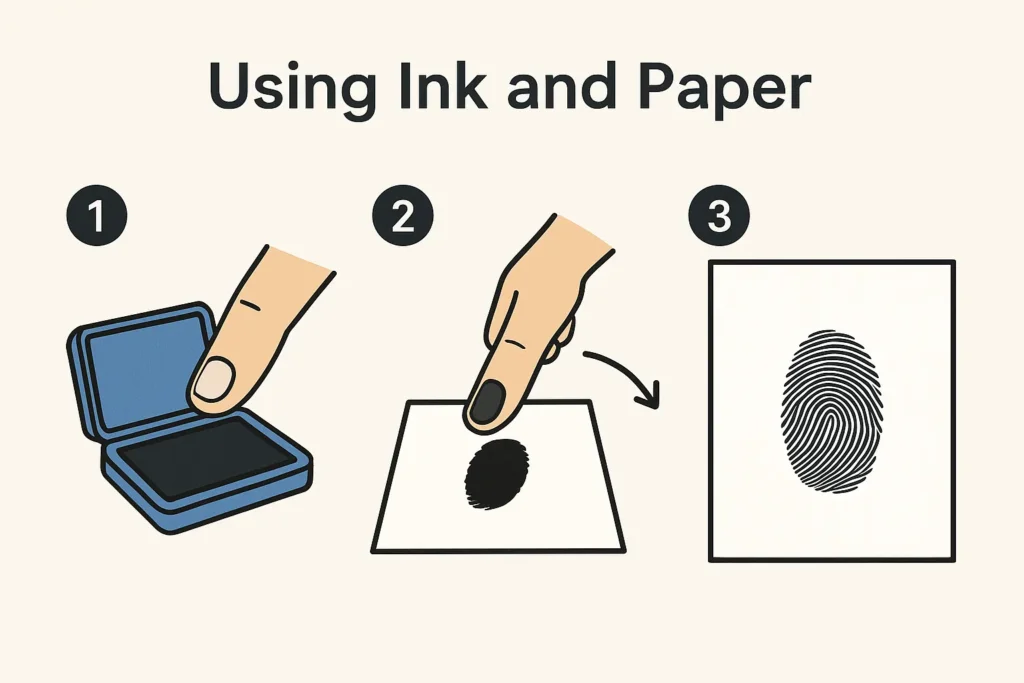
Method 1 – Using Ink & Paper for Fingerprint Jewelry
- Wash and dry your hands
- Use a clean black ink pad
- Press your finger gently and roll on white paper
- Take a high-resolution photo of the clearest print (300 DPI or more)
- Send the original photo to us, not a screenshot
Method 2 – Smartphone Capture for Fingerprint Guide Jewelry
- Use your smartphone camera (no flash)
- Place your finger on a black or dark background
- Take a close-up photo with natural light
- Ensure fingerprint ridges are clearly visible
- Save as JPG or PNG and send the file directly
Best Practices for Fingerprint Jewelry Engraving
- Use good lighting and avoid blur
- Don’t crop the fingerprint — we’ll do that
- Label files if sending multiple prints
If you’re unsure, visit our contact page for guidance or stop by our Toronto studio for help capturing your print in person.